Agent Guardrails 2026: NeMo, Llama Guard, Claude SDK Hooks
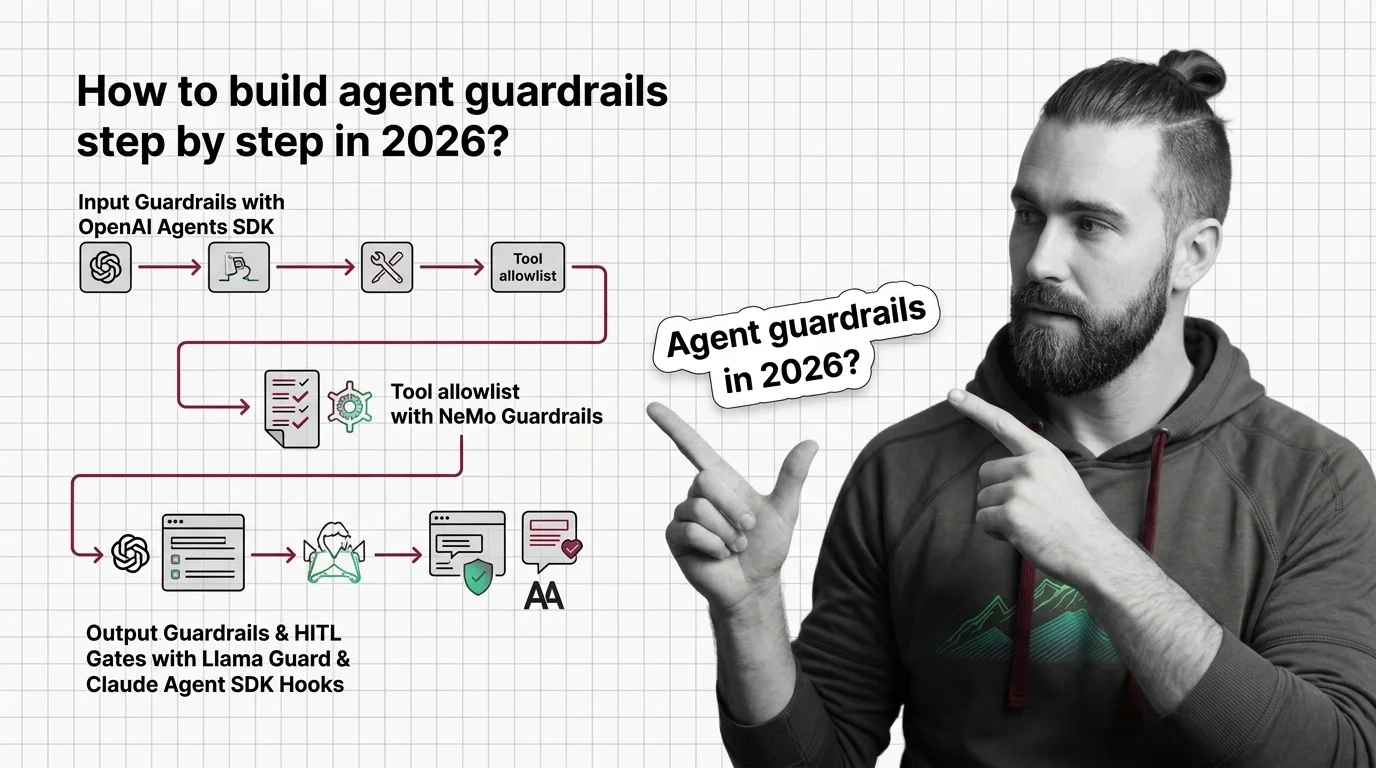
Table of Contents
TL;DR
- Guardrails are layered checkpoints, not a single product. Stack them at input, tool boundary, and output — each layer catches what the others miss.
- Tool-call gates are the highest-leverage layer in 2026. Most production incidents start when an agent calls the wrong tool with the wrong arguments.
- Every guardrail you add needs a test case. A guardrail without a triggering example is a hope, not a control.
Your agent worked all week. On Monday it spent the morning in a retry loop, hammering a billing endpoint with malformed arguments before the on-call engineer killed the process. The model didn’t go rogue. It just had a tool that didn’t say no, a permission layer that said yes by default, and zero output checking on the way back.
That class of incident is what Agent Guardrails are supposed to prevent — and the reason most teams fail at it is that they try to bolt on a single library instead of architecting layers.
Before You Start
You’ll need:
- An agent runtime — Claude Agent SDK, OpenAI Agents SDK, or LangGraph
- Working understanding of Guardrails as a concept, not a library
- A clear list of the tools your agent can actually call in production
- One concrete failure scenario you want to prevent
This guide teaches you: How to decompose agent safety into independent layers, decide which layer catches which class of failure, and wire them in the right order.
The Tool That Said Yes to Everything
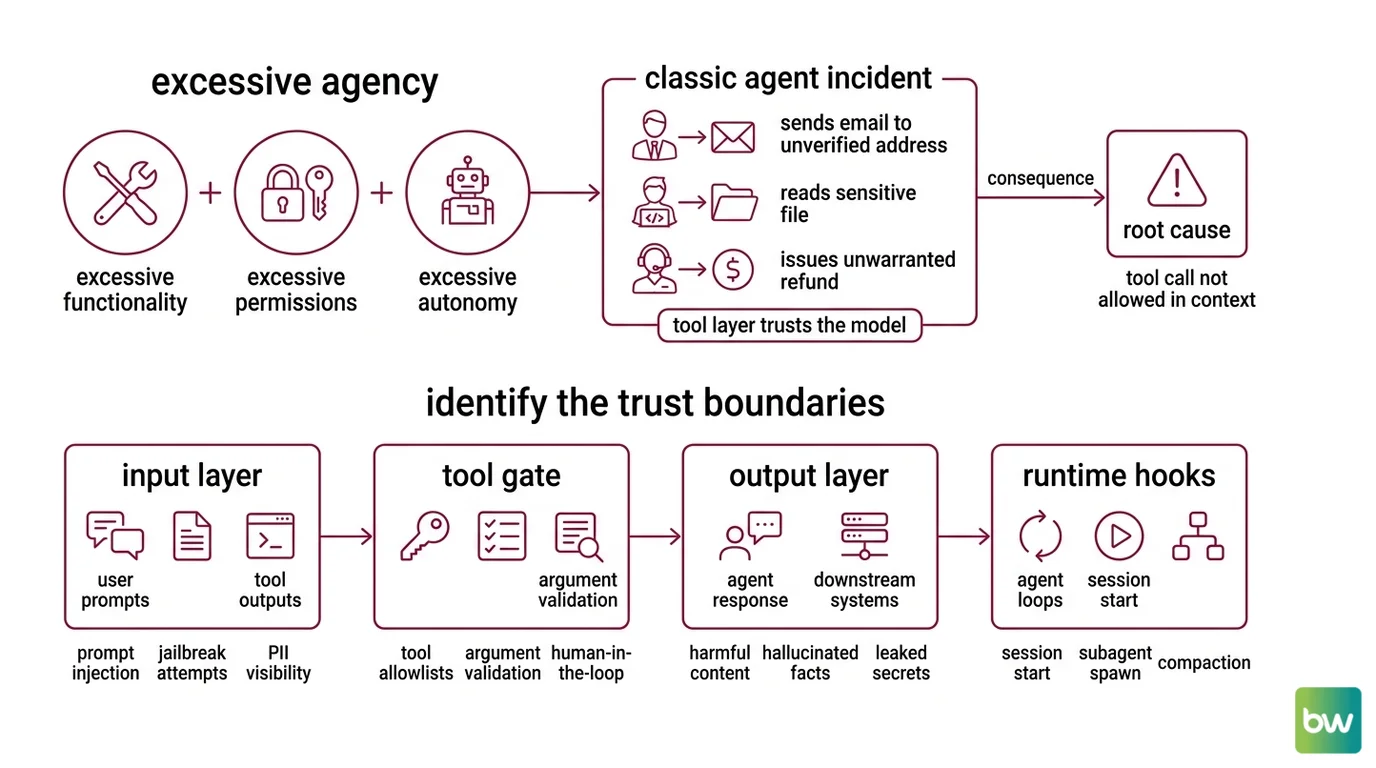
The classic 2026 agent incident is not a jailbreak. It is a normal user request that triggered a tool call that should never have been allowed in that context.
A finance agent generates an invoice and triggers send_email to an address it pulled from a poisoned document. A coding agent reads a .env file because nothing told it that path was off-limits. A support agent issues a refund because the prompt said “be helpful.” Three different agents. Same root cause: the tool layer trusted the model.
It worked on Friday. On Monday, the input distribution shifted by a few percent and the agent found a path nobody specified.
OWASP catalogues this exact pattern as Excessive Agency — the combination of excessive functionality, excessive permissions, and excessive autonomy (OWASP GenAI Security Project). The fix is not “make the model safer.” The fix is to specify what the system around the model is allowed to do.
Step 1: Identify the Trust Boundaries
Before you reach for a library, draw the boundaries. An agent has four places where untrusted input meets trusted action. Each one is a separate concern. Each one needs its own guardrail.
Your system has these layers:
- Input layer — User prompts, retrieved documents, tool outputs from prior turns. Anything entering the model context. Concerns: prompt injection, jailbreak attempts, off-topic queries, PII the agent should not see.
- Tool gate — The point where the model says “call tool X with arguments Y” and the runtime decides whether to execute. Concerns: tool allowlists, argument validation, permission scope, human-in-the-loop (HITL) approval for high-impact actions.
- Output layer — The agent’s final reply to the user, plus any text it returns to a downstream system. Concerns: harmful content, hallucinated facts, leaked secrets, off-policy advice.
- Runtime hooks — Lifecycle events around the agent loop itself: session start, subagent spawn, compaction, completion. Concerns: audit logging, budget caps, session-level policy enforcement.
A fifth concern — Agent Evaluation And Testing — sits outside the runtime but defines whether the other four are working. Treat it as the harness, not a layer.
The Architect’s Rule: If you cannot say which layer is supposed to catch a given failure, no layer will catch it.
Step 2: Lock Down What the Agent Can See, Call, and Return
Each layer has a different specification. The mistake is to treat them as one config file. They are four contracts.
Input layer contract:
- Which classifiers run on user input — prompt-injection detection, jailbreak detection, PII redaction
- Which classifiers run on retrieved documents — same set, different threshold
- What happens on a positive classification — block, redact, or annotate-and-forward
- Which inputs bypass classification — internal system messages, trusted retrieval sources
Tool gate contract:
- The exact set of tools each agent role is allowed to call
- For each tool, the schema and value constraints on its arguments
- Which tools require HITL approval before execution
- Which tools are allowed only in specific session contexts (e.g.,
send_emailonly after a user confirmation turn)
Output layer contract:
- Categories the output classifier checks — violence, self-harm, privacy, regulated advice
- The fallback the agent emits when output is blocked
- Whether the original generation is logged for review
Runtime hooks contract:
- Per-session token and dollar budget
- Maximum subagent depth
- Audit fields written on every tool call
- Trigger conditions for kill-switching the session
The Spec Test: If your tool gate config does not list every tool by name with an explicit allow/deny rule, your agent has at least one tool it can call that nobody approved.
Step 3: Wire the Layers in Order
Build order matters. Start with the tool gate, not the input filter. A leaky tool boundary is the most common production failure, and the layer that protects you even when the input classifier misses something.
Build order:
Tool gate first. This is the layer that prevents incidents, not just embarrassments. In the Claude Agent SDK, this is the
PreToolUsehook plusPermissionRequestcallbacks. The hook receives the tool name and arguments, and returns apermissionDecisionof"allow","deny", or"ask"(the TypeScript SDK adds"defer"). When multiple hooks fire, precedence isdeny > defer > ask > allow— any single deny blocks the call (Claude Agent SDK Docs). For OpenAI Agents SDK 0.17.0, this is the@tool_input_guardraildecorator, which raises a tripwire exception when the arguments fail validation (OpenAI Agents SDK Docs).Output layer second. Wrap the agent’s final response in a classifier check. The Llama Guard family is the current open-weight default — Llama Guard 4 is a 12B multimodal safety classifier that scores text-and-image inputs against the MLCommons 14-category hazard taxonomy and outputs a per-category verdict (Llama Guard 4 Model Card). For prompt-injection-specific scoring on inputs, pair it with Llama Prompt Guard 2 (86M or 22M classifier variants), which produces a binary benign/malicious decision (Llama.com Docs). In Python agent code, the OpenAI Agents SDK exposes
@output_guardrailfor the same purpose, raisingOutputGuardrailTripwireTriggeredwhen a check fails.Input layer third. Now wire the input rails. Nemo Guardrails organises rails into five categories in v0.21.0 — input, dialog, output, retrieval, and execution (NVIDIA Docs) — and the input rail is where you run prompt-injection classifiers, PII redaction, and topic checks before the model ever sees the message. NeMo’s IORails engine runs these rails in parallel, which matters when you stack three or four classifiers per request (NeMo Guardrails GitHub).
Runtime hooks last. Add lifecycle hooks for budgets, audit, and kill-switches. Claude Agent SDK exposes
PostToolUse,PostToolUseFailure,Stop,SubagentStart,SubagentStop,PreCompact, andUserPromptSubmitevents you can use for accounting and policy enforcement.
For each layer, your context must specify:
- What it receives (raw input, parsed tool call, generated output, lifecycle event)
- What it returns (verdict, rewritten input, blocking exception, log entry)
- What it must NOT do (mutate state outside its scope, swallow errors silently)
- How to handle classifier failure (fail-closed for high-stakes tools, fail-open with alert for low-stakes paths)
Compatibility notes:
- NeMo Guardrails Colang 2.0: Examples written against Colang 1.0 will not run unchanged on v0.21.0. Update flow syntax before copying older configs.
- Claude Agent SDK Python
SessionStart/SessionEnd: Not exposed as Python callbacks. Wire them as shell-command hooks viasetting_sources=["project"]instead.permissionDecision: "defer": TypeScript SDK only. The Python SDK supportsallow,deny, andask.- OpenAI Agents SDK guardrail scope: Input guardrails fire only on the first agent in a chain; output guardrails fire only on the agent producing the final output. They do not run between every handoff.
Step 4: Prove Each Layer Catches What It Should
A guardrail without a test case is decoration. For each layer, write at least one input that should trigger it and one input that should pass through cleanly.
Validation checklist:
- Tool gate test. Send a message that asks the agent to call a denied tool. Failure looks like: the tool executes anyway, or the deny is silent and the agent reports success.
- Tool argument test. Send a message that asks for a valid tool with out-of-range arguments. Failure looks like: arguments are coerced silently, or the call goes through with the bad value.
- Input classifier test. Send a known prompt-injection payload — something from the Llama Prompt Guard test set or your own red-team library. Failure looks like: the payload reaches the model and the model follows it.
- Output classifier test. Force the model to generate a response in a blocked category (using a test-only prompt). Failure looks like: the response reaches the user, or the fallback is missing.
- HITL gate test. Trigger a high-impact tool call. Failure looks like: the call executes without an approval prompt, or the approval is auto-confirmed.
- Budget cap test. Run a session designed to exceed your token or dollar limit. Failure looks like: the cap is logged but not enforced.
If a check fails, fix the spec for that layer before moving on. Adding a second classifier to compensate for a leaky first classifier is how you end up with four layers and zero coverage.
Common Pitfalls
| What You Did | Why It Failed | The Fix |
|---|---|---|
| Treated NeMo Guardrails as a tool allowlist | NeMo does not ship a feature called allowlist. The pattern is built from input rails plus Colang dialog flows that match on tool names | Specify the allowlist in a Colang flow that runs before tool dispatch, then add a deny-by-default fallback |
| Relied on the model to refuse | Models are trained to be helpful. They will be helpful with a poisoned input | Move the refusal into the tool gate or output classifier, not the system prompt |
| Wired one mega-guardrail | A single classifier checking input, output, and tool args has one failure mode for everything | Split into per-layer specs with their own thresholds and test cases |
| Set every check to fail-open | A classifier that errors becomes a no-op. Production traffic looks safer than it is | Fail-closed on high-impact tools, alert-and-route-to-HITL on output, log-and-continue on input only when the model has no tools |
| Skipped the audit hook | First incident postmortem requires reconstructing what the agent saw and called. Without PostToolUse logs you are guessing | Wire PostToolUse (or its equivalent) on day one. Store tool name, arguments, return value, and the prompt that produced the call |
Pro Tip
Treat your guardrail config as a separate artifact from your agent prompts. Prompts change weekly. Guardrails should change with a review. When the two live in the same file, the guardrail gets edited every time someone tweaks tone — and an “improvement” to the system prompt becomes a silent loosening of the safety contract.
Frequently Asked Questions
Q: How to build agent guardrails step by step in 2026? A: Start with the tool gate, not the input filter — that is where most production incidents originate. Then add an output classifier (Llama Guard 4 is the current default), then input rails for prompt-injection detection, then lifecycle hooks for budgets and audit. Watch out for fail-open defaults: a classifier that times out and silently passes the request is the most common reason a “fully guardrailed” agent still ships an incident.
Q: How to use NeMo Guardrails for tool allowlists and HITL gates?
A: NeMo does not have a built-in allowlist checkbox. You build the pattern with tool input rails plus a Colang 2.0 flow that matches on tool name and either allows the call, denies it, or routes it through a HITL confirmation flow. Use the IORails engine when you stack multiple classifiers — it runs them in parallel so latency does not multiply with each rail you add.
Q: How to add input and output guardrails with the OpenAI Agents SDK?
A: Use the @input_guardrail and @output_guardrail decorators in openai-agents 0.17.0. Each decorated function returns a GuardrailFunctionOutput — set tripwire_triggered=True to halt the run with an InputGuardrailTripwireTriggered or OutputGuardrailTripwireTriggered exception. One scope gotcha: input guardrails fire only on the first agent in a handoff chain, output guardrails only on the last. For per-tool checks, use @tool_input_guardrail and @tool_output_guardrail instead.
Your Spec Artifact
By the end of this guide, you should have:
- A four-row trust boundary map — input, tool gate, output, runtime hooks — with the failure class each row catches
- A per-layer constraint list — classifiers, decisions, scope, fail behavior — that fits on a single page per layer
- A six-test validation checklist — tool gate, tool args, input classifier, output classifier, HITL gate, budget cap — each with a triggering input and a pass-through input
Your Implementation Prompt
Paste the prompt below into Claude Code, Cursor, or your AI coding tool of choice. Replace every bracketed placeholder with values from your own spec artifact. The prompt mirrors the four-layer decomposition from Step 1 and the build order from Step 3.
You are helping me wire agent guardrails for [agent name and purpose].

Runtime: [Claude Agent SDK Python | OpenAI Agents SDK 0.17.0 | LangGraph + NeMo Guardrails 0.21.0]
Allowed tools: [comma-separated tool list with one-line description each]
Tools requiring HITL approval: [subset of the above]
High-impact tools (fail-closed on classifier error): [subset of the above]

Build the layers in this order:

1. Tool gate. Implement [PreToolUse hook | @tool_input_guardrail | NeMo input rail with Colang flow] that:
   - Allows only the tools listed above
   - Validates arguments against [JSON schema or value-constraint description per tool]
   - Routes [HITL tool list] to a permission prompt before execution
   - Returns deny on unknown tools or invalid arguments

2. Output classifier. Wrap the final response with [Llama Guard 4 via PurpleLlama | @output_guardrail | NeMo output rail] that:
   - Checks for [list of MLCommons categories that matter for this agent]
   - Returns [exact fallback string the agent emits when blocked]
   - Logs the original generation to [audit destination]

3. Input rails. Add [NeMo input rail | @input_guardrail] that runs:
   - Llama Prompt Guard 2 on user input with threshold [number from your test set]
   - PII redaction for [field list]
   - Fail behavior: [block | redact | annotate-and-forward]

4. Runtime hooks. Wire [PostToolUse | session lifecycle event] that:
   - Logs tool name, arguments, return value, latency to [audit destination]
   - Enforces a per-session cap of [token budget] and [dollar budget]
   - Triggers kill-switch when [specific condition]

For each layer, write one test that should trigger the guardrail and one that should pass through. Output the test cases as runnable code in [pytest | your test framework].
Ship It
You now have a four-layer trust map, a per-layer contract, and a build order that puts the highest-leverage layer first. The next time someone asks “are our agents safe?” you can point at the layers, the test cases, and the audit log — instead of pointing at a system prompt and hoping.
AI-assisted content, human-reviewed. Images AI-generated. Editorial Standards · Our Editors