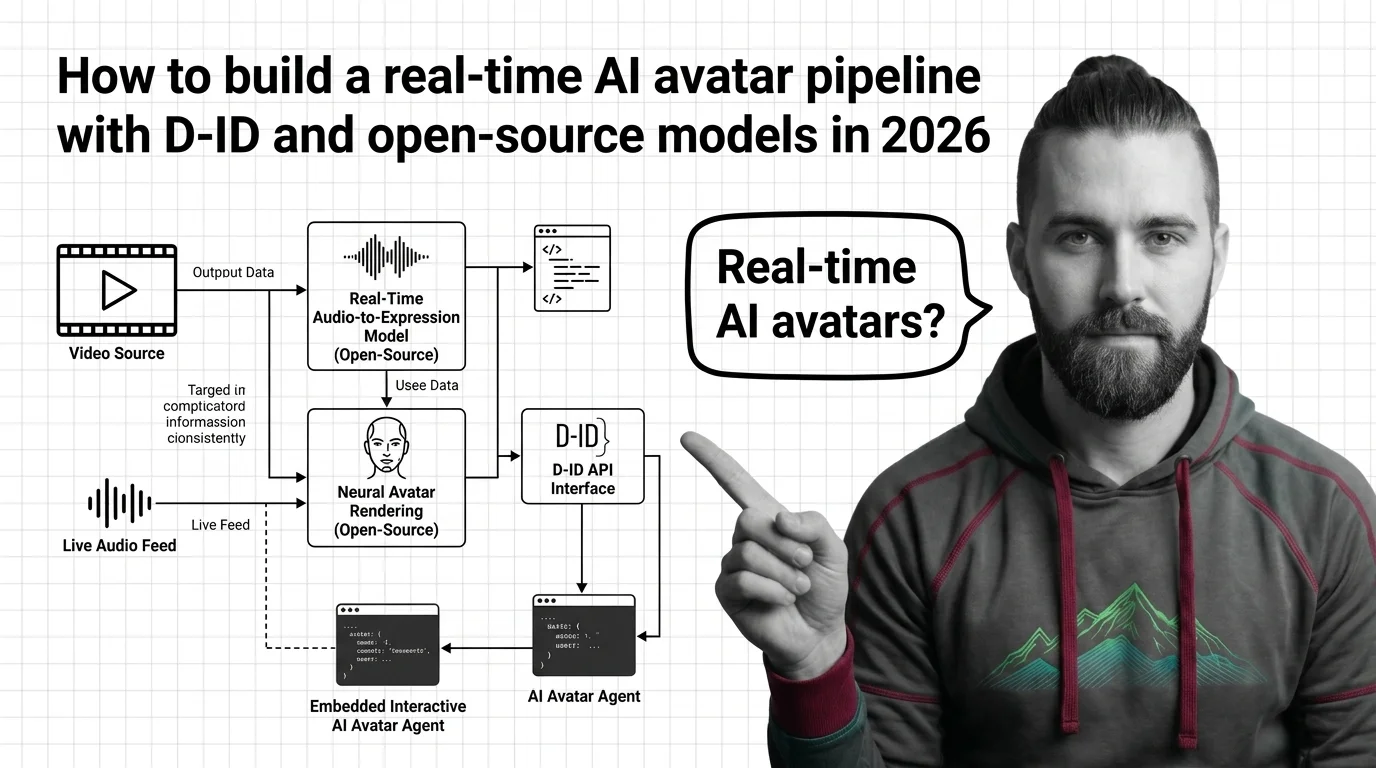
How to Build a Real-Time AI Avatar Pipeline with D-ID and Open-Source Models in 2026
TL;DR
- Decide the build-vs-buy split before you touch an SDK: a managed conversational layer like D-ID’s Expressive Agents, or a self-hosted lip-sync model you run on your own GPU.
- LiveKit Agents’ 1.0 migration broke the API surface most pre-2026 D-ID tutorials were written against — pin versions or your scaffolded code won’t import.
- Open-source lip-sync buys zero per-minute cost and full data control. It also hands you the GPU provisioning, latency tuning, and failure handling D-ID was doing for you.
You wire up a D-ID streaming demo on a Tuesday. It works against your laptop’s webcam mic, so you ship it as a proof of concept. Two weeks later it’s in front of a real customer on flaky Wi-Fi, and the avatar’s mouth lags its voice by half a second. Nobody can say whether that’s the network, the model, or the code — because nobody specified which layer owned it.
That gap is what this guide closes.
Before You Start
You’ll need:
- A D-ID Studio account (agent ID + client key) for the managed path, or a CUDA-capable GPU and a Python environment if you’re self-hosting Lip Sync
- A working grasp of Talking Head Synthesis — the broader research category both paths sit inside
- A clear answer to “is this scripted or conversational,” because that decision changes every layer below it
This guide teaches you: how to decompose a real-time AI Avatar Generation pipeline into four independently-specified layers, then choose per layer whether D-ID’s managed stack or an open-source model owns it.
Scope check, before you build anything: this guide specs the conversational, video-based Digital Human pipeline — a 2D face that talks back in real time. If you actually need a volumetric avatar reconstructed from NeRF or Gaussian Splatting captures, or a generative Text-to-3D character, that’s a different pipeline with different constraints. Don’t let scope creep in here.
The Lip-Sync Lag Nobody Specified
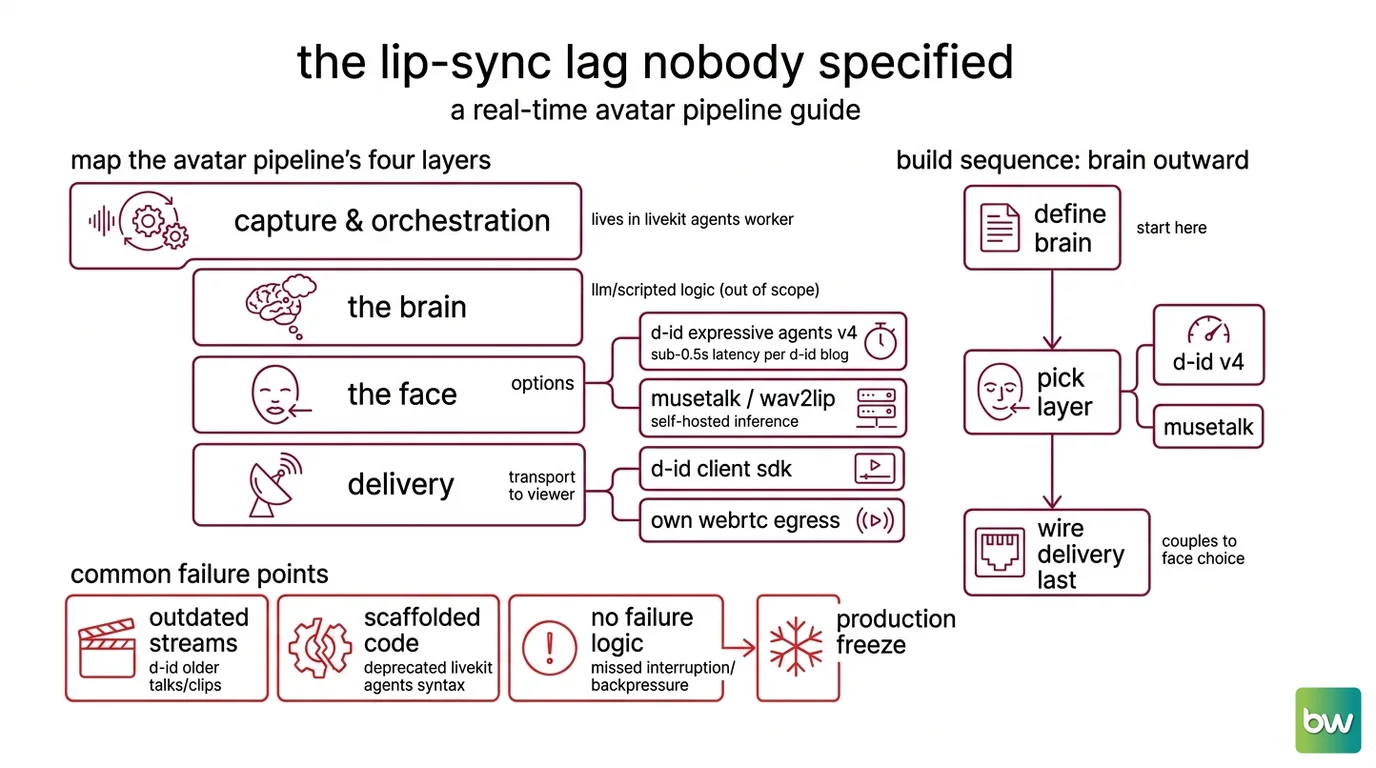
The failure mode I see most: a team builds against D-ID’s older Talks or Clips streams — or against a LiveKit Agents tutorial written before the 1.0 rewrite — gets a clean demo, and ships it. The demo never has to handle interruption, backpressure, or a model migration. Production doesn’t get that luxury.
It worked in the demo. In production, the avatar froze mid-sentence, because the scaffolded code called @llm.ai_callable, a decorator that no longer exists in current LiveKit Agents.
Step 1: Map the Avatar Pipeline’s Four Layers
A real-time avatar isn’t one model. It’s four layers, and each one fails differently.
Your system has these parts:
- Capture and orchestration — the LiveKit Agents worker that receives the user’s turn (voice or text) and decides when the avatar should respond
- The brain — whatever LLM or scripted logic produces the reply content; out of scope for this guide, but its output is the input to everything below
- The face — the lip-sync or avatar-render layer: D-ID’s Expressive Agents (V4) if you’re managed, MuseTalk or Wav2Lip if you’re self-hosting
- Delivery — the transport that gets rendered video to the viewer: D-ID’s client SDK binding a stream to a
<video>element, or your own WebRTC egress if you’re self-hosting
How to build a real-time AI avatar generation system from scratch in 2026?
Start from the brain outward, not from the face inward. Define what produces the reply text first — that’s your only fixed point. Then pick your face layer: D-ID’s V4 Expressive Agents if you want sub-second latency without managing infrastructure (D-ID reports sub-0.5-second response latency on the V4 tier, per the D-ID Blog), or MuseTalk if you want to own the inference and skip per-minute billing. Wire delivery last — it’s the layer most coupled to whichever face you picked, so locking it down too early forces a rebuild the moment you change your mind about the face.
The Architect’s Rule: If you can’t explain the system in three layers, the AI can’t build it either.
Step 2: Specify Which Layer Owns Latency, Identity, and Provenance
This is the step everyone skips, and it’s the one that decides whether your AI tool scaffolds working code or a plausible-looking dead end.
Context checklist:
- Avatar tier and transport named explicitly — D-ID Talks/Clips on plain WebRTC, Expressive Agents (V4) on LiveKit, or a self-hosted model with your own transport
- LiveKit Agents version pinned —
AgentSession, not the retiredVoicePipelineAgentorMultimodalAgent - Identity source defined — a reference clip, a still photo, or a pre-built presenter, depending on which model you chose
- Identity consent documented — a synthetic likeness speaking on someone’s behalf becomes a Deepfake the moment that documentation is missing, regardless of how good the lip-sync is
- Latency budget per conversational turn, and whether your face layer can actually hit it
- GPU and VRAM budget if self-hosting
The Spec Test: If your context doesn’t name a LiveKit Agents version, the AI defaults to whatever pattern dominates its training data — pre-1.0
VoicePipelineAgentcode that throws an import error against current releases.
Budget is part of the spec too, and here’s the one number in this guide you should treat as a placeholder, not a fact: third-party trackers report D-ID’s entry tier anywhere from about $5 to $6 a month, because D-ID’s own pricing page renders the table in JavaScript and the trackers disagree with each other. Put a line in your spec for “confirm current pricing on D-ID’s site,” not a hardcoded dollar figure.
Step 3: Sequence the Build — Brain, Face, Pipe
Order matters more here than in most AI-assisted builds, because the face layer is where the managed and self-hosted paths actually diverge in implementation.
Build order:
- The brain, first — no dependencies, and every downstream layer needs its output shape defined before it can be specified
- The face, second — for D-ID, that means creating a V4 agent via the Agents API and authenticating with an agent ID and client key from D-ID Studio; for self-hosted, that means standing up MuseTalk or Wav2Lip inference fed by your own TTS audio
- Delivery, last — it depends entirely on what the face layer outputs, so specifying it before Step 2 is settled just gets thrown away
For each component, your context must specify:
- What it receives — text, audio, or both
- What it returns — a video stream, a stream reference, or a file
- What it must NOT do — block the brain’s next turn, retry silently past your latency budget
- How to handle failure — fall back to audio-only, freeze on last good frame, or drop the session
How to use the D-ID API to embed interactive AI avatar agents into a website or app?
On the browser side, this is front-end-only work, per D-ID Docs. Install @d-id/client-sdk, initialize it with the agent ID and client key from D-ID Studio, and whitelist the domain you’re deploying to. The SDK exposes an onSrcObjectReady callback that hands you a media stream object; bind that directly to a <video> element and you’re live. If you’re routing through LiveKit instead of D-ID’s own client SDK, the integration runs through a Python plugin: create the V4 agent with a POST to D-ID’s Agents API, then drive the session with LiveKit’s AvatarSession class, per LiveKit Docs.
Compatibility notes:
- LiveKit Agents Python SDK: The 1.0 migration (current release 1.6.4, per LiveKit PyPI) removed
VoicePipelineAgent,MultimodalAgent, andChatManager, and replaced the@llm.ai_callabledecorator with@function_tool. Code or tutorials written against pre-1.0 Agents will not import. Installlivekit-agents[did]~=1.5or later and targetAgentSession.- D-ID streaming tiers: Talks (V2) and Clips (V3) still run over plain WebRTC and still work, but real-time conversational use now routes through Expressive Agents (V4) on LiveKit. Tutorials built on the older Talks/Clips streaming path don’t reflect D-ID’s current recommended integration.
- Wav2Lip licensing: The original repository doesn’t clearly confirm commercial-use terms — verify before shipping it in a commercial pipeline. MuseTalk (MIT-licensed) or Sync Labs’ commercial HD variant of Wav2Lip are clearer paths.
Step 4: Prove the Face Matches the Voice
“It ran without errors” is not validation. Validation is checking that the specific failure modes of a real-time avatar pipeline didn’t happen.
Validation checklist:
- Sync offset — failure looks like: viewers notice the mouth trailing the audio, especially after a network hiccup or a long reply
- Turn-taking latency — failure looks like: response time creeping well past whatever budget you set in Step 2, particularly under concurrent sessions
- Identity consistency — failure looks like: the avatar’s face drifting, warping, or losing likeness over a long session, which shows up more on single-photo models than on reference-clip-trained ones
- Failure-mode behavior — failure looks like: a frozen frame or a silently dropped stream instead of the fallback you specified in Step 3
Common Pitfalls
| What You Did | Why AI Failed | The Fix |
|---|---|---|
| Asked for “a talking avatar like D-ID” in one prompt | Brain, face, and delivery got collapsed into one undifferentiated build, so the AI guessed at the boundaries | Decompose into the four layers first, specify each separately |
| Didn’t name a LiveKit Agents version | AI scaffolded against VoicePipelineAgent, which throws an import error on current releases | State livekit-agents[did]~=1.5 (or current) and require AgentSession explicitly |
| Skipped failure handling for the face layer | AI generated only the happy path — no fallback when the stream drops or the GPU queues | Add a named fallback (audio-only, last-good-frame, drop session) to the spec |
| Picked a self-hosted model without a GPU budget | AI assumed cloud-scale hardware and produced a config that won’t run on what you actually have | Name your VRAM ceiling before generating any inference code |
Pro Tip
Managed versus self-hosted isn’t a technology decision — it’s a decision about who owns your failure modes. D-ID owns latency, uptime, and GPU provisioning for you, and charges for that ownership. MuseTalk and Wav2Lip hand you the model for free and hand you the operations along with it. MuseTalk in particular renders at real-time speeds — 30 frames per second or better on an NVIDIA Tesla V100, per its GitHub repository — and runs on as little as 4GB of VRAM, like an RTX 3050 Ti, just slower. Decide who’s on call first, before you decide the model. If your spec doesn’t actually need a custom pipeline at all, HeyGen’s Avatar V — its newest flagship avatar model, per the HeyGen Blog — and Synthesia package the entire stack behind an editor: more per-minute cost, far less engineering time.
Frequently Asked Questions
Q: How to build a real-time AI avatar generation system from scratch in 2026? A: Decompose into four layers — capture/orchestration, the brain producing replies, the face (D-ID Expressive Agents or self-hosted MuseTalk), and delivery — then specify each independently. The detail most builds miss: pin your LiveKit Agents version explicitly, since the 1.0 rewrite changed the API most older tutorials assume.
Q: How to use the D-ID API to embed interactive AI avatar agents into a website or app?
A: Install @d-id/client-sdk, authenticate with an agent ID and client key from D-ID Studio, whitelist your deployment domain, and bind the stream from the onSrcObjectReady callback to a <video> element. Watch out for the domain whitelist specifically — a mismatched origin can fail silently instead of throwing a clear error.
Your Spec Artifact
By the end of this guide, you should have:
- A four-layer pipeline map — capture/orchestration, brain, face, delivery — with the boundary between each layer named
- A locked contract — avatar tier, SDK/library versions, identity source and usage rights, latency budget, GPU budget
- A validation checklist — sync offset, turn-taking latency, identity consistency, and named failure-mode behavior
Your Implementation Prompt
Drop this into Claude Code, Cursor, or Codex once you’ve filled in the brackets. It mirrors the four-layer decomposition from this guide.
You are scaffolding a real-time AI avatar pipeline. Build it in this order.

## Step 1 — Layer map
Capture/orchestration: [LiveKit Agents worker | other]
Brain: [your LLM/conversation logic — input/output shape]
Face: [D-ID Expressive Agents V4 | MuseTalk | Wav2Lip | other]
Delivery: [D-ID client SDK + <video> element | LiveKit AvatarSession | custom WebRTC egress]

## Step 2 — Contract
Avatar tier and transport: [name explicitly — do not let the AI infer it]
SDK/library versions: [e.g., livekit-agents[did]~=1.5, @d-id/client-sdk version]
Identity source: [reference clip | photo | pre-built presenter]
Identity rights record: [how usage permission for the identity source is documented and stored]
Latency budget per turn: [your target, in milliseconds or "best effort"]
GPU/VRAM budget: [your ceiling, or "managed — not applicable"]

## Step 3 — Build order
1. Brain — no dependencies, define output shape first.
2. Face — depends on brain's output; specify inputs, outputs, and what it must NOT do (block, retry silently).
3. Delivery — depends entirely on the face layer's output format.

For each layer, specify:
  - inputs (schema)
  - outputs (schema)
  - forbidden actions
  - failure handling (fallback behavior, not just "retry")

## Step 4 — Validation
Write checks for:
  - sync offset between audio and mouth movement
  - turn-taking latency against the Step 2 budget
  - identity consistency over a full session length
  - failure-mode behavior matches the Step 3 fallback spec

Output: working pipeline + validation checklist, no layer left unspecified.
Ship It
You now have a way to decompose “build me an AI avatar” into four layers an AI tool can actually scaffold correctly, instead of one prompt it has to guess at. The managed-versus-self-hosted decision stops being a vibe and becomes a spec line. Next build, you’ll know which layer is yours to own before you write a single prompt.
AI-assisted content, human-reviewed. Images AI-generated. Editorial Standards · Our Editors