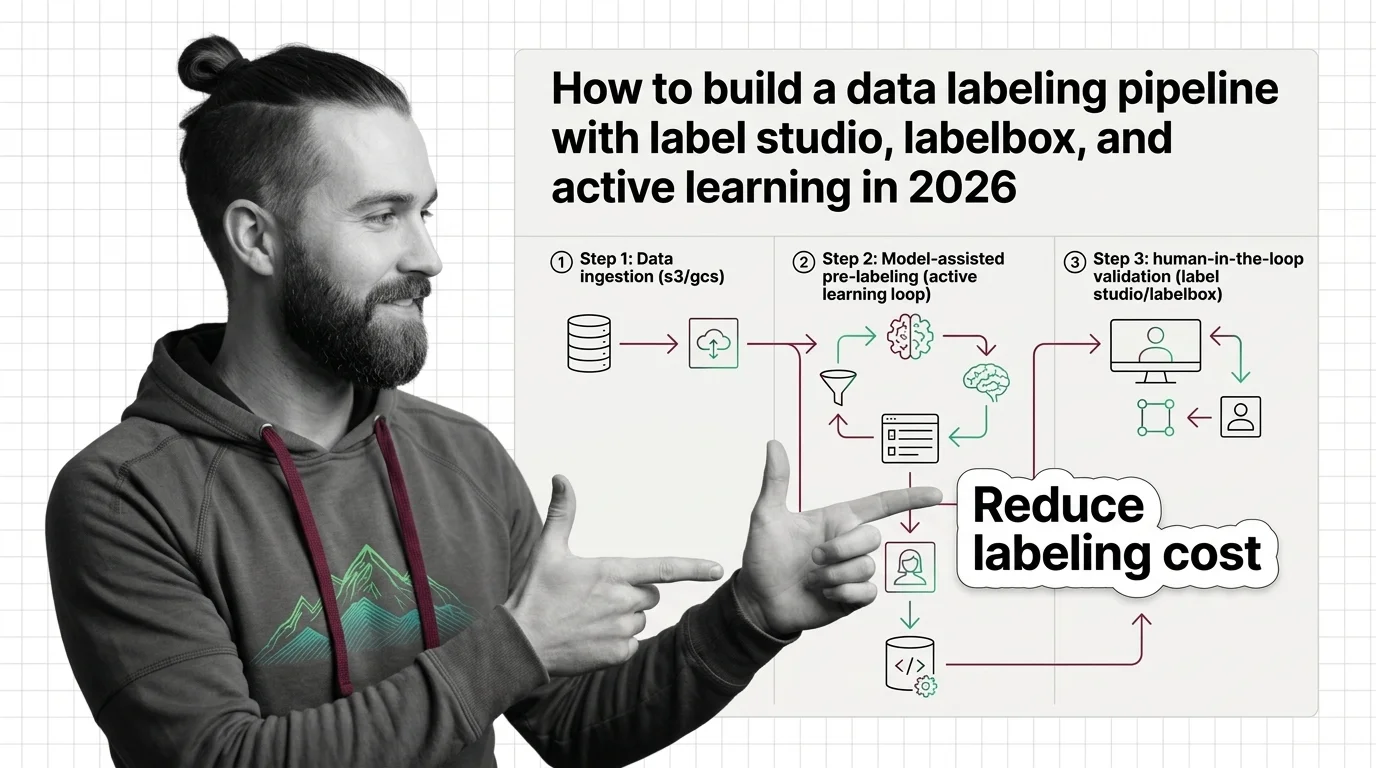
How to Build a Data Labeling Pipeline with Label Studio, Labelbox, and Active Learning in 2026
TL;DR
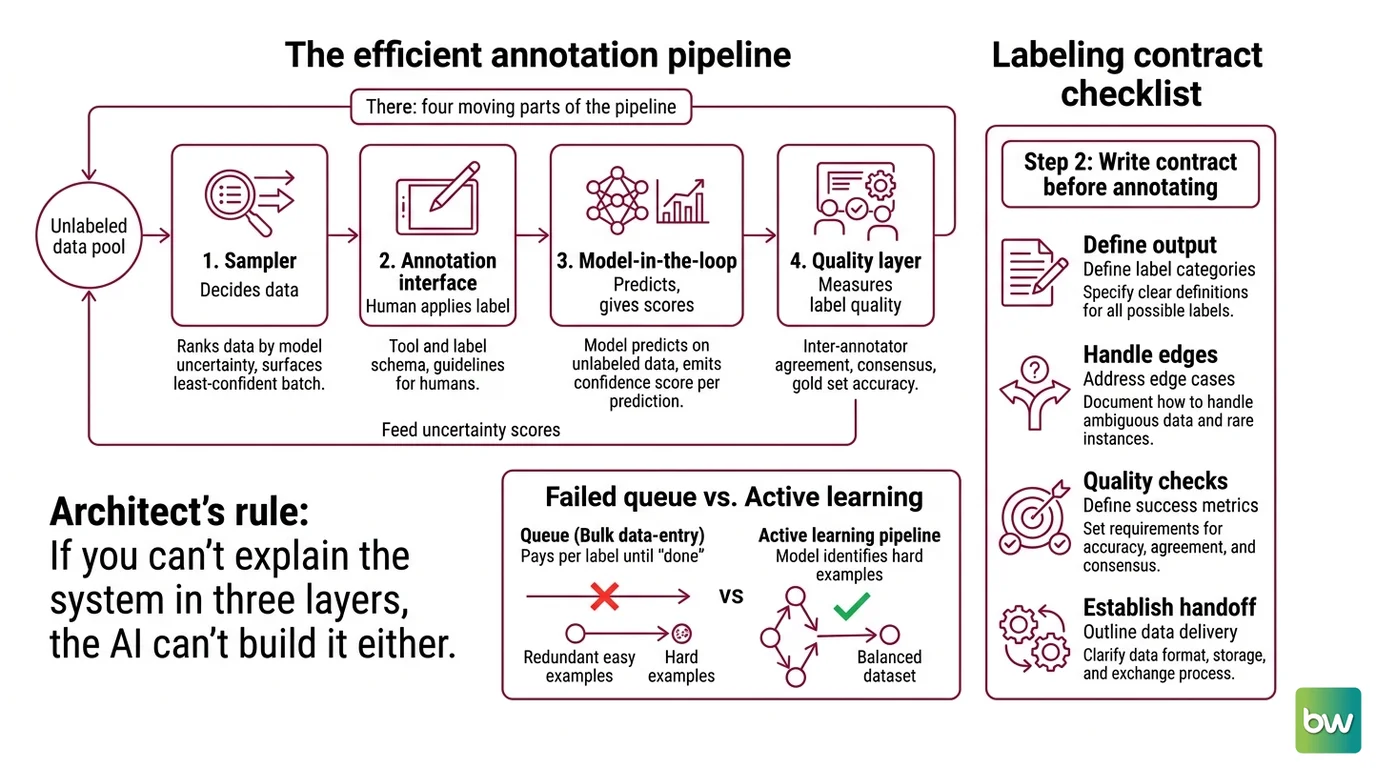
- A labeling pipeline is four components, not one tool: a sampler, an annotation interface, a model-in-the-loop, and a quality layer.
- Active learning is the cost lever — label the samples the model is unsure about, skip the ones it already gets right.
- The tool choice (Label Studio, Labelbox, CVAT) follows from your data type and where the automated loop has to live.
A team I talked to last quarter labeled forty thousand support tickets. Cost a fortune, took six weeks. Then the model trained — and barely moved off its baseline. The problem wasn’t the model. It was that thirty-five thousand of those tickets were variations of “please reset my password,” and the model had that nailed after the first few hundred. They paid full price to teach it nothing.
That is what a labeling pipeline without a sampling strategy gets you. Let me show you how to build one that spends its budget where the model is actually confused.
Before You Start
You’ll need:
- An annotation tool — Label Studio, Labelbox, or CVAT (we’ll pick the right one in the FAQ)
- A working grasp of Data Labeling And Annotation and what Ground Truth means for your task
- A model — even a weak baseline — that can score its own confidence on unlabeled data
- A raw dataset you can run deduplication against before anyone labels a thing
This guide teaches you: how to decompose an annotation project into four components, specify the contract between them, and wire Active Learning so your annotators only see the samples worth their time.
The Annotation Project That Burned the Budget Before the Model Trained
The default failure mode is treating labeling as a bulk data-entry job. You dump every unlabeled record into a queue, hand it to annotators, and pay per label until the dataset is “done.” The model gets a mountain of redundant easy examples and a handful of the hard ones that actually carry information.
It worked fine in the pilot. On the full run, the budget evaporated because nobody specified which samples deserved a human — so the queue defaulted to all of them.
Step 1: Break the Pipeline Into Four Moving Parts
You can’t specify a system you can’t name. Before you open any tool, decompose the pipeline into components with clear boundaries. Each one does a single job and hands off a defined output to the next.
Your system has these parts:
- Sampler — decides what gets labeled next. In a naive pipeline this is “everything, in order.” In an active learning pipeline, it ranks unlabeled data by model uncertainty and surfaces the least-confident batch.
- Annotation interface — the tool plus the label schema. This is where a human applies a label according to your guidelines. It owns nothing about which sample appears, only how it gets labeled.
- Model-in-the-loop — a model that predicts on unlabeled data and emits a confidence score per prediction. Those scores feed the sampler. This is the engine that makes active learning possible.
- Quality layer — measures whether the labels are trustworthy: Inter Annotator Agreement, consensus on overlapping samples, and accuracy against a gold set.
The sampler and the model-in-the-loop are the two parts most teams skip. They are also the two that separate a pipeline from a queue.
The Architect’s Rule: If you can’t explain the system in three layers, the AI can’t build it either.
Step 2: Write the Labeling Contract Before Anyone Annotates
The single most expensive mistake in annotation is starting before the schema is locked. Annotators interpret ambiguity differently, your agreement scores crater, and you re-label everything. The fix is a contract — written, versioned, agreed on before the first label.
Context checklist:
- Label schema defined — every class, with a one-line definition and a positive and negative example for each
- Edge cases listed — the ambiguous cases written down with a ruling, so two annotators reach the same answer
- Agreement threshold chosen — the minimum inter-annotator agreement you’ll accept before a batch counts as done
- Tool and version pinned — Label Studio 1.23.0, a specific Labelbox project config, or a CVAT release, not “latest”
- Active learning trigger specified — the confidence threshold below which a sample gets routed to a human, and the batch size that triggers a retrain
- Deduplication done first — run deduplication on raw data so you never pay to label the same record twice
That schema isn’t bureaucracy. It is the thing that keeps your Training Data Quality from depending on which annotator happened to pick up a sample.
The Spec Test: If your contract doesn’t define an agreement threshold, “done” means nothing — a batch with two annotators flipping coins will pass the same as a batch they agree on completely.
Step 3: Sequence the Build So Active Learning Has Something to Learn From
Order matters here, because active learning is a loop and a loop needs a starting point. Build the parts in dependency order, not in the order they look exciting.
Build order:
- Schema and guidelines first — because every other component reads from this contract. No interface, no model, no QA until the schema is frozen.
- Annotation interface plus a small gold set next — stand up the tool, label a few hundred high-confidence samples by hand. This gold set is your ground truth and your first training signal. The model has nothing to be uncertain about until it exists.
- Quality layer third — wire agreement metrics and gold-set checks before you scale. You want to catch a broken schema at three hundred labels, not thirty thousand.
- Model-in-the-loop and the active learning cycle last — train the baseline on the gold set, predict on the unlabeled pool, score uncertainty, route the least-confident batch back to annotators, retrain. Repeat.
For each component, your context must specify:
- What it receives (inputs) — the sampler receives confidence scores; the interface receives a ranked sample
- What it returns (outputs) — the interface returns a label plus annotator ID; the model returns a prediction plus a confidence
- What it must NOT do (constraints) — the interface must not re-rank; ranking is the sampler’s job alone
- How to handle failure (error cases) — what happens when two annotators disagree past your threshold
In Label Studio, the model-in-the-loop is the ML backend: an SDK that wraps your model as a web server with a fit() method that trains on each new annotation through a webhook and a predict() method that returns the confidence scores your sampler ranks on, per Label Studio Docs. That predict() output is the whole active learning engine. Without it, you have a very nice labeling tool and no loop.
Step 4: Prove the Labels Are Trustworthy
Labels that pass a vibe check are not ground truth. Validate against measurable criteria, and know what each failure looks like before it happens.
Validation checklist:
- Inter-annotator agreement clears your threshold — failure looks like: two annotators labeling the same sample differently more often than your schema allows, which means the guidelines are ambiguous, not the data
- Gold-set accuracy holds — failure looks like: new labels diverging from your trusted gold set, which means schema drift crept in as the project scaled
- Model confidence is calibrated — failure looks like: the model reporting high confidence on samples it gets wrong, which poisons the sampler and feeds annotators the wrong batch
- No duplicate labor — failure looks like: the same near-identical record appearing in multiple batches, which means deduplication ran late or not at all
Automated agreement metrics, consensus matrices, and auto-reassignment of low-agreement tasks are Enterprise features in Label Studio, per Label Studio Docs. On the Community edition you compute agreement yourself from the exported annotations — same math, more manual.
A note on tool compatibility before you pin versions — some of the convenience libraries around these tools have moved underneath teams recently:
Compatibility notes:
- Labelbox Python SDK: The data-connector libraries (labelbase, labelspark, labelpandas, labelsnow, labelbox-bigquery) are publicly archived and no longer maintained, and some Export v2 non-streamable methods broke in a prior SDK update, per Labelbox Docs. Don’t build a new pipeline on the archived connectors.
- Label Studio SDK: The legacy
_legacylibrary in the>=1,<2line is deprecated — use the current SDK API, per Label Studio Blog.- Pricing is volatile: Labelbox’s
$0.10per Labelbox Unit is a unit rate, not a flat per-label cost — consumption scales with data type and annotation complexity. Always confirm current pricing on the provider’s own page before you write a cost number into a spec.
Common Pitfalls
| What You Did | Why AI Failed | The Fix |
|---|---|---|
| Labeled everything in queue order | No sampling strategy — model drowns in redundant easy examples | Rank by model uncertainty; label the least-confident batch first |
| Started before the schema was frozen | Annotators interpret ambiguity differently; agreement collapses | Lock and version the contract before the first label |
| Skipped deduplication | Paid to label the same near-identical record many times | Run data deduplication on the raw pool first |
| Trusted model confidence blindly | Uncalibrated model routes the wrong samples to humans | Validate calibration against a gold set before scaling the loop |
Pro Tip
Build the smallest loop that closes before you scale anything. One schema, a few hundred gold labels, a baseline model, one retrain cycle. If that loop produces calibrated confidence scores and clears your agreement threshold, you have a pipeline — scaling it is just adding volume. If it doesn’t close at small scale, scaling only multiplies the broken part. This is true whether your data is text, images, or video, and it is true regardless of which tool you pick.
Frequently Asked Questions
Q: How to set up a data annotation pipeline step by step in 2026? A: Freeze the label schema, stand up an annotation tool with a small hand-labeled gold set, wire the quality layer, then add a model-in-the-loop that scores uncertainty and feeds a sampler. One watch-out: stand up agreement metrics before you scale — catching a broken schema at three hundred labels is cheap, catching it at thirty thousand is not.
Q: How to use active learning to reduce labeling cost on large datasets? A: Run your baseline model over the unlabeled pool, rank predictions by confidence, and send only the least-confident batch to annotators; retrain and repeat. In Label Studio the fully automated loop is an Enterprise feature — on Community you replicate it manually by sorting on the ML backend’s confidence output and retraining in batches.
Q: How to choose between Label Studio, Labelbox, and CVAT for an annotation project? A: Match the tool to your data type and where the loop runs. Label Studio covers the broadest range — text, image, audio, video, time series — and self-hosts free on Community. Labelbox is managed SaaS with pay-as-you-go pricing and strong model-assisted labeling. CVAT is the computer-vision specialist for bounding boxes, segmentation, and tracking, free when self-hosted.
Your Spec Artifact
By the end of this guide, you should have:
- A four-component pipeline map — sampler, annotation interface, model-in-the-loop, quality layer — with the input/output contract written for each boundary
- A versioned labeling contract: schema, edge-case rulings, agreement threshold, and the active learning trigger
- A validation checklist with a named failure symptom for each check, so a broken pipeline announces itself instead of hiding
Your Implementation Prompt
Paste this into your AI coding tool (Claude Code, Cursor, Codex) when you scaffold the pipeline. It mirrors the four components and forces you to fill in the contract before any code is generated. Replace every bracket with your own value.
Scaffold a data labeling pipeline with four separate components. Do not
merge them — each has one job and a defined input/output contract.

1. SAMPLER
   - Input: per-sample confidence scores from the model component
   - Output: a ranked batch of the [N] least-confident unlabeled samples
   - Constraint: ranking logic lives ONLY here

2. ANNOTATION INTERFACE
   - Tool: [Label Studio | Labelbox | CVAT], version [pin exact version]
   - Data type: [text | image | video | audio | time series]
   - Schema: [list classes with one-line definitions]
   - Output: label + annotator ID; must NOT re-rank samples

3. MODEL-IN-THE-LOOP
   - fit(): retrain on new annotations after every [batch size] labels
   - predict(): emit a confidence score per unlabeled sample
   - Constraint: confidence must be calibrated against the gold set

4. QUALITY LAYER
   - Inter-annotator agreement threshold: [your minimum]
   - Gold-set accuracy check against: [path/size of gold set]
   - Failure handling: route disagreements above threshold to [reviewer]

Build order: schema first, interface + gold set second, quality layer
third, model + active learning loop last. Before generating, run
deduplication on the raw pool at [data source].
Ship It
You now have a mental model that separates which sample gets labeled from how it gets labeled — and that separation is the whole game. Decompose the pipeline into four parts, freeze the contract, and let active learning point your budget at the samples that carry information. You can decompose any annotation project this way now, whether it’s forty thousand support tickets or a million video frames.
AI-assisted content, human-reviewed. Images AI-generated. Editorial Standards · Our Editors